


Tacky Glue
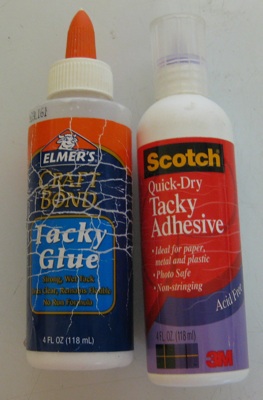
There are so many brands of white glue on the market. You will see, in the photo to the left, that Elmer's Craft Bond does not show "Acid Free" on the label. However, Scotch Quick Dry Tacky Adhesive does show "Acid Free" in the lower purple portion of the label. It rolled to the right when I took the picture but you can still see it. Both of these glues wash off brushes of all types with running water. Both of these brands of tacky glue can be purchased at your local craft/hobby store.
The NON acid free glue is good in card making. Attaching ribbon, bows, buttons, chipboard pieces, and glitter to card fronts. You will need to let the glue dry over night before you hand over your card or send it in the mail. DO NOT use this glue in scrapbook layouts.
The Scotch Quick Dry Tacky Adhesive can be used in scrapbook layouts to adhere flowers, buttons, bows, chipboard pieces, glitter, and any other object. Never use liquid glue to attach photos to layouts. If you should wish to take the photos off and remake the layout as you progress in your learning, the photos will tear, crack, and be totally ruined. Trust me! Experience talking to you. There are specific adhesives for photos and you will learn about them later in this section.

Glossy Accents
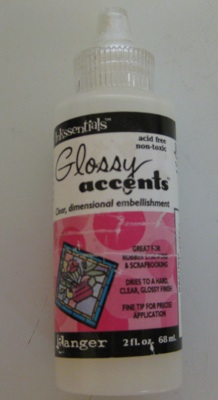
Glossy Accents can be purchased at your local craft/hobby store. It is a product made by Ranger Industries. It is in the product line of Tim Holtz.
One of the things I like about Glossy Accents is that it is thick and does not run or spread. Where you place it is where it will stay and dry. Glossy Accents retains its depth during the drying and curing process.
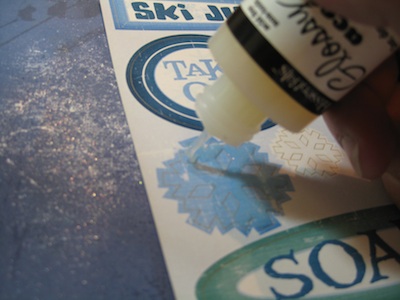
When used on stickers to make "Faux Epoxy Stickers", as in the photo, it is important to leave the sticker on the backing paper it came with. I've tried taking the sticker off and applying the Glossy Accents afterwards and the sticker curls in a ball when wet with the glue and it dries that way. Total BUMMER!
Sometimes there are air bubbles in the Glossy Accents when applying it in this type of application. You can chase the bubbles out or try to prick them with a pin. I choose to add glitter to the wet glue. Hides a multitude of sins *grin*.
Leave your sticker to completely dry before you try to use it. The recommended wait time on the bottle is two (2) hours but I find that it is better to leave it for longer. Overnight preferably.
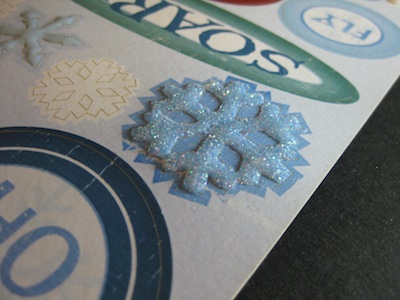
I do not know what the properties are in this glue but it will retain the height and give your stickers a "3-D" effect. If you are a rubber stamper and have an image of a rose or other flower you can give that image a "POP" by adding a drop of Glossy Accents on a petal or two. Give it a "Dew Drop" effect.
One of the drawbacks of this glue is that it dries in the nozzle and clogs up. You will need to have a straight pin handy. Remove the cap, stick the pin in the nozzle hole and work the pin in a circular motion then draw it back out. The glue will flow freely once again.
This glue can be used to adhere ribbon, bows, buttons, beads, chipboard, anything EXCEPT photographs. In this treatment it is the same as any other liquid glue. It is acid free and can be used in both scrapbook layouts and in cards. This glue really shines when you want to add dimension to an image. There are more things you can do with this dimensional glue than just these few mentioned here.
Bookbinding Glue
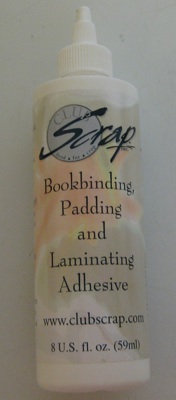
Bookbinding glue, made and sold by Club Scrap, is specially formulated for adhering papers of all kinds to chipboard and cardboard when creating books, journals, and boxes. As with any other liquid glue, do not use this glue when adhering photos. Although it is Acid Free it is not to be used on photos.
This bookbinding glue dries quickly, has a permanent bond to paper and cardboard items, and is flexible. It easily washes out of brushes and sponges while still wet and comes off your hands with running water - even after it has dried for a long time.
This glue also "Laminates". Have a stack of index cards, same size scrap papers, copy paper that is all the same size? Stack your papers together and hold them firmly with binder clips on two edges fairly close to the top edge. Using this bookbinding glue, spread a generous amount along the edge of the papers with a sponge brush and let it dry. Apply another coat of this glue and let it dry. Do this another couple times, until you have four coats of the dried glue on the end of your papers. Once it is fully dry you can remove the binder clips and now you have a pad of paper that you can use for notes. The papers are all adhered from the end you put the glue on and they won't be getting lost.
You can make a cover for your new note pad by covering chipboard or cardboard in your favorite paper. Cut the chipboard or cardboard 1/4" larger on all sides than your note paper and you will have the best note holder to give as a gift.
Decoupage Glue
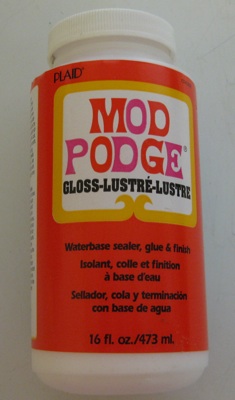
Mod Podge is a glue that is NOT ACID FREE and is not recommended for use in scrapbook layouts. You can use it on paper flowers you create and attach to card fronts but not in scrapbooks.
Mod Podge has an odor that can be unpleasant to some people. It washes off all brushes with clear running water while it is still wet. Mod Podge is made by Plaid and can be found at your local craft/hobby store.
This glue has many uses but is mainly used for adhering paper to boxes. It is called a "Decoupage" adhesive for this very reason. Paint some of this glue on the back of a decorative paper, brush some on the box or item you want to cover, then place the paper on the box. Using more of the Mod Podge apply more of the glue over the decorative paper you just adhered and let it all dry. This particular glue is a "Gloss" and will be shiny when it dries.
Mod Podge has a tacky feel, even after drying, and takes quite a while to fully dry. Depending on the amount of coats you apply it could take up to three or four months before this glue fully cures. It will be dry to the touch and have a tacky feel until it is fully cured.
Using this glue on paper flowers makes them stiff and hold their shape better and for a longer time. If you want your flowers to maintain the curls and bends you so diligently worked at, apply a coat or two of Mod Podge and the flowers will hold their shape.
E6000 Adhesive
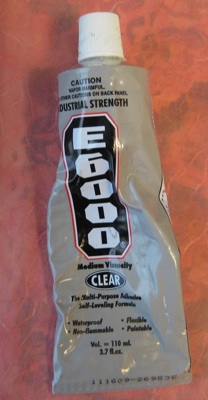
E6000 STINKS. It has an odor that is very strong and lasts quite a long time. If you are sensitive to chemical odors, I would not recommend using this glue. It won't make you loopy or high, nor will it give you a headache and it does not have to be used in a well ventilated room. It just STINKS. E6000 can be purchased at most craft/hobby stores and at hardware stores.
So, if it stinks so bad why would you want to even have that stuff in your craft area? The reason I keep it is because of the bond strength it has. If you are making an item that will get a lot of use, be dropped a few times, will be crammed into a handbag or purse, or in a backpack you will want something with some mojo holding power. This adhesive has all that and more.
I make journals, books, and bulletin boards which all end up having something on them that needs to be stuck on good. E6000 is clear when applied and is clear when it dries. Once the item is fully dry, usually overnight, you will have to pry it off where it is stuck. You will also damage the surface of what it is stuck to, so plan carefully when using this adhesive.
E6000 is a really thick adhesive that is very gooey. A little of this stuff goes a long way. Unlike the other adhesives in this section, you don't paint this stuff on. Squeeze a small amount onto wax paper or a paper towel, for really small items like rhinestones apply this adhesive with a toothpick. I generally squeeze the tube until I get a blob coming out of the neck and adhere the blob to what I want stuck. When you take the tube away there will be stringy stuff, like hot glue strings. Clean up any mess quickly with a paper towel.
E6000 is not water soluble and does not wash out of paint or sponge brushes. It will roll off your fingers or hands as other glues do but won't do that with brushes.
In the "Feathers and Flourishes" section of "Supplies" I mention using E6000 to adhere feathers to my projects. This adhesive has a quick hold. As you use "Super Glue" to mend something broken, hold the pieces together for up to 30 seconds, your best results with the E6000 is to do the same after you apply this to your project. Whatever you want held down with the glue hold it in place for 30 seconds then leave it to dry.
2-Way Glue
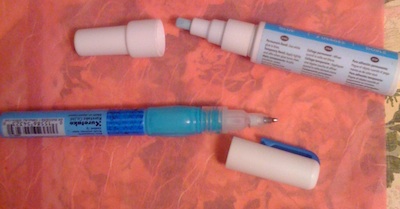
I nearly forgot about this "liquid glue". I don't use it very often is why it is last on this list.
2-Way Glue is a product sold by Stampin' Up!. The Zigg Glue Pen is available at craft/hobby stores and comes in a couple different sizes.
This glue hides a "Dual Personality". The color is blue when it is wet. Attaching glitter or any kind of embellishment while the glue is "blue" it will have a permanent bond when it fully dries.
The other property of this glue is that if you apply it to any surface and let it dry until clear then it becomes a "Repositionable" glue. Meaning that it is tacky but will not have a permanent hold. There will be many times, as you craft more, that you just want something stuck down for a small amount of time and be able to safely remove the item without damaging what it was stuck to. This glue is really good for that.
There is a stamping technique, known as "Masking". Stamp your image on the card stock of your choice. Stamp the same image on a scrap piece of paper large enough to accommodate the image. Cut the image out, following very close to the stamped outline. Apply a little bit of the 2-Way Glue to the back of your image and let it dry.
Next step is to place this cut out image over the original stamped image on your card stock. Ink you stamp and stamp close to the first image and over the mask. Remove the mask and you will see that the second image magically goes "Behind" the original image.
If you have a die cut of a flower, for example, you can stick the flower die cut on a piece of white card stock using the Two-Way glue after it turns clear, of course, then ink up a rubber stamp or use a sponge and ink up the surface of the card stock and the die cut flower. When you are done inking, remove the die cut flower and you have total white space where the flower was protecting the card stock. Quite a good looking effect.
Attention Rubber Stampers
Using this 2-Way Glue on your Unmounted stamps (the backs of course), allow it to dry fully, your rubber stamps will now have a tacky surface to attach to your clear blocks. You can even "paint" this glue over the vinyl image that comes with Stampin' Up!'s unmounted stamps to make them cling to your clear blocks.
Attention Cricut Users
If the sticky has worn off your cutting mats and you are awaiting the arrival of the product to "resticky" your mats this glue will do in a pinch. Take you cutting mat to the sink and wash it really good with soap and water. Pat dry the mat and leave it to air dry for several minutes. Then apply a coat of this glue to your mat and let it fully dry. You will have a sticky mat once again and can get back to you crafting.