Paper Trimmers
When you go into a craft/hobby store or shop online at a scrapbook site, the items listed below will be plentiful. Some paper trimmers can be found at office supply stores and some of the big box stores.
All of these "trimmers" can, and will be, used in scrapbook or card making. These are tools that will be the most costly as far as a crafting budget is concerned. They range in price from $20 to $50. The benefit you will get from these trimmers far outweigh the initial costs involved. You won't need to replace them as you would paper products, adhesives, or embellishments.
With proper care these items will last you for a long time. Some trimmer blades will need to be replaced from time to time because they dull after a while. Clean up is very easy and quite affordable. Rubbing alcohol is all that is needed to care for your trimmers. It cuts through sticky glues of all types, removes paper dust, and you probably already have a bottle in your home. Just a bit of rubbing alcohol applied to a cotton ball or paper towel will do the trick.
I have a video that I made in 2010 about cleaning your tools. Paper crafting, although fun to do, makes a mess and leaves behind sticky residue on your tools. To keep them working at top performance they need attention once in a while.
Guillotine Trimmer

A "Guillotine" trimmer is much like the old paper trimmers that you may have seen in school. The trimmer shown in the photo is from "Tonic Studios" and is purchased online. Some craft/hobby stores carry this type of trimmer. This trimmer is the most costly of all shown here. It is around $50 plus shipping.
The benefit of a "Guillotine" type trimmer is there is no blade replacement. It is self sharpening. Each cut it makes, the blade rubs against a steel plate that acts as a sharpening tool. This trimmer will accommodate 12" x 12" paper. There are two "ears" (for lack of a better term) on the body of this trimmer. Depressing on the "ears" will securely hold the paper being cut, they will stop the paper from shifting. This trimmer allows for multiple pieces of paper to be cut at one time.
I use this paper trimmer a lot! This trimmer is used to cut cardboard and chipboard. Because of the heavily built cutting blade and wide base of the trimmer body I can get large box panels cut cleanly.
When cutting down cardboard boxes to use in your crafting you will need to cut away the flaps, using scissors or a craft knife, before you try inserting it in this trimmer. The cardboard will also need to be cut down to 12" height to fit under the plastic stationary bars near the cutting blade.
This trimmer is very large in size. Although light weight and easily carried around, this trimmer is not ideal for a small crafting area where space is a premium. The one disadvantage of this paper trimmer is the handle grip. It is comfy in your hand with the soft grip, it does have a tendency to detach from the trimmer body when carrying it by the handle and can do some damage to your toe. Just ask my husband about that one.
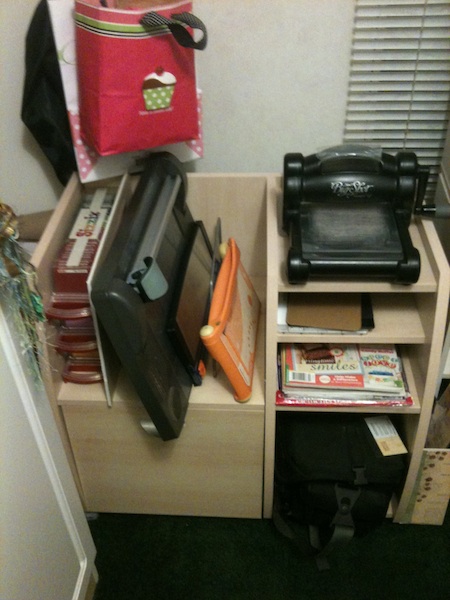
My craft space is one of the bedrooms in our home. I find having a place to put this trimmer away while not in use is tricky. Normally it stands on its head and leans against one of my armoire cupboards. To get in the cupboard means moving the trimmer out of the way.
If you are fortunate to have a large crafting space with plenty of table or counter space this trimmer would be ideal in your area. The cuts are clean and precise with this trimmer. The 12" x 12", base along with the 1/2" grooved markings, makes lining up your paper for cutting easy to do.
Rotary Trimmer

A "Rotary" trimmer has a thin, very sharp round blade for cutting. This blade is similar to what fabric crafters, such as quilters, use when cutting fabric. In the photo shown, the rotary blade, is concealed beneath the handle located at the top right of the trimmer in the photo. There is a locking arm that holds the paper in place during the cutting process so it does not shift. This trimmer will accommodate 12" x 12" paper. There is a spare blade tucked safely away in the top part of the trimmer body. This trimmer is light weight and is portable by the handle molded into the body of the trimmer.
This trimmer costs around $30 and can be purchased at any craft/hobby store.
This trimmer is another type that requires lots of room to work with. It is lightweight and portable and takes up a lot of space on your work surface. I store this trimmer on the handle side with the blade facing upward.

It is not necessary to have multiple paper trimmers in your craft space. As a beginning crafter a sliding blade trimmer, later in this section, is your best purchase.
I do a lot of different types of crafting and my needs vary depending on the thickness of the paper involved and the size of the paper.
One of the advantages of having a Rotary Trimmer is the clean cuts it makes. The pressure bar snaps locked to hold your paper in place as you run the blade along the length to make your cuts.
The one disadvantage is in scoring your paper for card making or for any other type of scoring for folds. Using this trimmer to make score marks for card folds can be accomplished as long as you keep in mind that you have to adjust your paper 1/8" to the right of the cutting blade when using a bone folder to make your score marks. Also, move the cutting blade to the bottom of the trimmer and away from the area you wish to score. The blade housing makes it difficult to get near the bar to score your paper.
Sliding Blade Trimmer

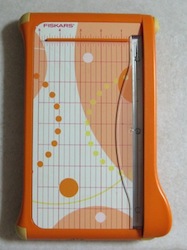
A "Sliding Blade" trimmer has an extension arm that pulls out to accommodate 12" x 12" papers. The blade slides up and down through a groove in the blade holder swing arm fixture of the trimmer. In the photo shown, the swing arm fixture is blue in color. There is a scoring blade that comes with this type of trimmer that does not cut but presses a crease in the paper. Card makers use this type of trimmer for the dual purpose. The scoring blade can be easily inserted in the swing arm fixture. Either move the cutting blade out of the way and add the scoring blade or remove the cutting blade then insert the scoring blade. The "Sliding Blade" trimmer will require replacement blades that can be purchased at any craft/hobby store and are reasonably priced. The replacement blades come in a pack of two (2).
As you watch YouTube videos about card making you will see this type of paper trimmer used more frequently. This trimmer costs about $20 and can be found in office supply stores, craft/hobby stores, and at online scrapbook stores. Fiskars is the major manufacturer you will find in craft/hobby stores and office supply stores.
This trimmer is very light weight and is a good one to have in your craft space. It is a "multi function" tool to have. If you don't have the black colored piece that is the scoring tool you can use your bone folder inside the blue area where the cutting blade lives. Move the cutting blade to the bottom of the trimmer area and insert your bone folder to make your score marks.
This trimmer is excellent for making cuts within your card stock piece. This link to Splitcoast Stampers "Center Step Card" is an excellent tutorial in making a card with multiple score lines and inner cuts to create a card. The paper trimmer used in this tutorial is different from the one pictured here but the tasks are the same.
If you do not have a Score Board, as shown in the accompanying video to the Splitcoast Stampers link, you can use your bone folder in the cutting groove of your trimmer to accomplish the scoring as shown.
Personally, I don't use this trimmer much. I don't like the swing arm that comes out from the side of the trimmer for paper larger than 5" to cut. I have a difficult time reading the measurements at the trimmer body edge and the extension arm for accurate measurements.
Another thing I don't like about this type of trimmer is the jagged edges of the cuts it makes. When the blade dulls it leaves little bits of paper sticking out - like fuzz - in your cuts. The blades are not costly to replace. A package of two sells for about $3 at your craft/hobby store.
Small Guillotine Trimmer

Another type of "Guillotine" trimmer is this small one. It will accommodate 8-1/2" x 5" paper. Once again, the blade on this trimmer is self sharpening and does not need to be replaced. This trimmer is ideal for cropping photos or cutting photo mattes. There is a clear pressure plate next to the blade that, when pressed, will hold paper or photos from shifting during cutting.
This is my "Go To" trimmer. After I use one of the larger trimmers to cut my card stock down to the appropriate size for a card or a layout this trimmer is placed on my work surface.
The cutting surface is 8-1/2" long which allows me to feed through card stock to make cuts up to 5-1/4" for photo mattes or for card mattes. Once I get the measurements necessary for the card stock pieces I do all my trimming with this tool.
It is light weight and fits nicely in a corner of my work surface. I can crop photos by cutting out the area I want and make the photo mattes at the same time.
The measuring guides run the full length of the base for accurate cuts and makes alignment easy. For scrap pieces of card stock that have a wonky edge I can use this trimmer to make one straight cut then use that as my guide to make the rest of the sides straight.
The clear pressure bar allows me to see where stamped sentiments are on my paper and make equal distance margins around the sentiment piece.
The one disadvantage of this trimmer is that it is not wide enough for all of my cutting needs. Since I do have multiple trimmers in my craft room to serve this purpose then this one disadvantage is not so bad.
These are the trimmers I use in my paper crafting. You do not need all of these trimmers. As a Beginner the trimmer I would recommend would be the "Sliding Blade Trimmer" since it is light weight, will accommodate 12" x 12" paper, has a dual capacity of both cutting and scoring, and is relatively moderately priced. You can purchase this trimmer at any scrapbook or craft/hobby store, or online at any scrapbook site.


