


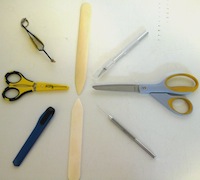
| Bone Folders | Craft Knives | Paper Piercer | Grid Ruler | Scissors | Tweezers | Cropadile | Silent Setter | Paper Crimper |
Hand Tools
The "Hand Tools" presented in this page are typical for both Card Making and Scrapbooks. Any of these hand tools can be purchased at your local craft/hobby store or any online scrapbook store.
Hand tools, the unsung heros of your crafting. When you get in a discussion with friends about scrapbook or card making tools the talk centers around trimmers or die cut machines. Very seldom will anyone get excited about hand tools. These items are all must haves in your paper crafting. Some items will be used quite frequently while others will only be used once in a while.
Bone Folders
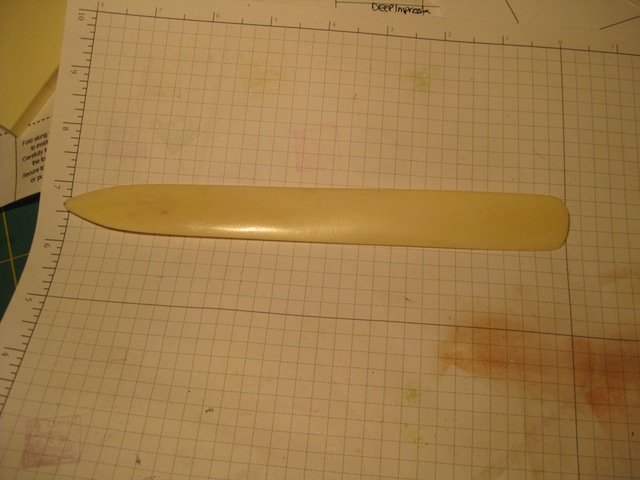
The bone folder is an oddly shaped tool. A pointed end that is used for scoring paper, which I will get into later, and knife like blades on both sides. The blades are not sharp, as a cutting knife would be, but tapered to a thin line.
Bone folders used to be made from ivory and animal bones, hence the name. Now they are made from a hardened plastic and colored to resemble the look of time worn ivory.
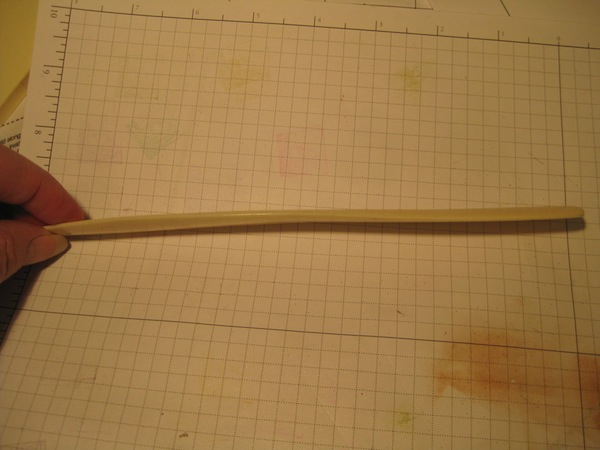
Holding the bone folder in your hand you notice a twist in the blade. You also feel, and see, the blade is thicker in the center part of the shaft then tapered sharply at both edges. This feature is ergonomic. It is comfortable in your hand and between your fingers. The twist allows both "lefty's" and "righty's" ease of use. The shape allows you to stand it on edge and hold tight as you press along the length of the paper being creased.
The tip of the blade follows a ruler closely. By applying pressure along the rulers length, the tip separates the paper fibers which leaves behind a "Score Line".
Having a padded object below your paper, such as a mouse pad or a piece of cardboard, allows the bone folder to sink deeper into the paper making a more defined groove line or Score. This line enables folding of paper to be easier and eliminates the bumps often seen and felt when you fold a piece of paper without the aid of this tool.
Card stock paper is better suited for using the bone folder because of the thickness of the paper. Thinner, text weight, papers tear under the pressure of the bone folder tip.
Pressing stickers to your layouts, adhering a flat embellishment with wet glue, or creasing paper is where the bone folders come in handy. When you place a sticker on your layout, for a time, it is repositionable. When you have the sticker where you want it then using a bone folder is ideal for this. Use the knife edge of the bone folder over the sticker. It squeezes out any air bubbles and makes the adhesive attach better to the paper. Pressing the bone folder over the sticker image activates the adhesive on the back of the sticker causing it to be permanently adhered.
Giving folds a sharp crease is what a bone folder is very good for. Card makers swear by bone folders just for this reason.

Craft Knives

Craft knives are a hand tool whose use is dependent upon the crafter.
Some crafters much prefer the use of a craft knife and a metal ruler, or a wooden ruler with a metal edge, to do their paper trimming rather than a paper trimmer. You may have read a book on paper crafting and noted the craft knife and ruler listed in the tools for a project.
Personally, I have trouble holding a ruler steady for a straight cut using the craft knife and ruler way. I prefer paper trimmers, which will be covered in another section, for cutting and sizing paper for projects.

A "Self Healing Mat" is something that is necessary when using a craft knife. This mat will save your table tops from damage. If you can't afford to get a self healing mat right now a piece of cardboard will do just as well in a pinch.
Cardboard can be from any box you have on hand. Cereal box, child's snack drink box, small appliance box. Cut a piece of the cardboard large enough to work with, preferably 12 inches by 10 inches. This will allow you to move the paper, or image, you are working on around in circles without causing an avalanche of stuff to hit the floor as you work. Make sure to have extra blades on hand because the cardboard will dull the blade after a while.
Cardboard also retains the cut and leaves a "ditch". Constant cutting over the same area on the cardboard will make your cuts hard to make and chew the paper up instead of cutting cleanly.
As you can see my self healing mat is well used. Criss cross slashes cover the center of my mat. Having this special mat under my paper allows for good cuts, even though it looks pretty trashed.
What would you do with a craft knife? In the video below I use my craft knife and self healing mat to cut out some chipboard to make an embellishment.
Paper Piercer
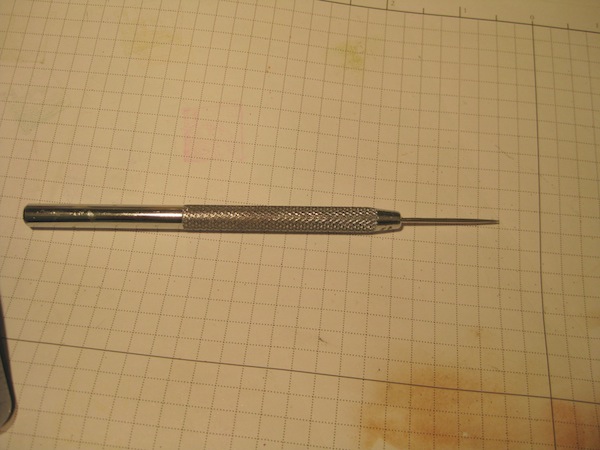
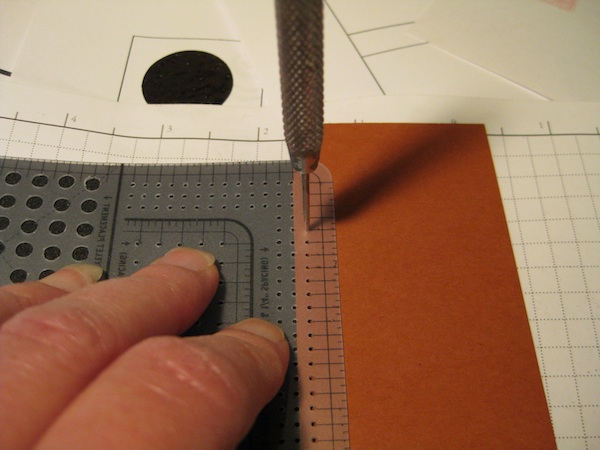
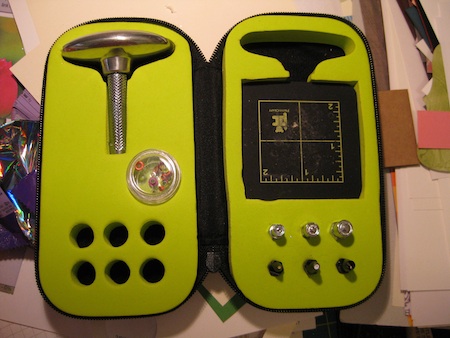
This is an EXTREMELY sharp pointed tool. This tool will stab you any chance that it gets. Careful handling by the textured barrel will eliminate getting poked - most of the time.
Store this tool upright with the point down. Don't be afraid or concerned about damaging the point on this tool. Aside from repeated pounding of the tip with a hammer to flatten it, you can't damage this tool.
It can also be stored lying flat, as shown in the photo, amongst similar items. I choose to store mine standing on the tip. Easier access for me when I need to use it. The majority of my hand tools are stored in a wooden box my daughter and her husband made as parting gifts for their wedding.

How can I find anything in there?! There is a lot of hunting involved. My paper piercing tool is usually stored in the bottom right corner of the box, next to my paper scissors.
What is a Paper Piercer used for? Any time you need to poke a hole through card stock or patterned paper and a whole punch makes too large of a hole.
If you will be adding brads to your card or layout a Paper Piercing tool is ideal for this. Once you have decided where the brad(s) will be placed, poke your hole and push the tool all the way through to the hilt. The shaft of the tool is larger at the hilt end than the tip. This allows for a larger opening that the brad points can go through without tearing your card stock or patterned paper and leaving a mess to be covered.
There are additional tools available if you wish to get fancy. You can find a "Piercing Guide" from most major manufacturers, in different styles, at your local craft/hobby store or online scrapbook stores. Mine is from Stampin' Up! and is called a "Mat Pack".
Click on the photo to see a larger image of this tool. As you look at it you will notice a grid of lines and holes that span the guide.
Want to have the effect of a Zig Zag stitch on your card or layout but don't own a sewing machine? Use the guide by lining it up straight on your paper, using the grid lines, then pierce the pre drilled holes with your piercing tool. Connect the dots (holes) with a gel pen or marker to become the Zig Zag stitch.
Using the guide you can pierce a double row of holes all the way around your card piece or layout to act as a containing border. The guide I have is only about 4 inches in length. The simplest way to keep it all lined up is to use the grid lines as your edge guide, line up the last two set of holes you pierced and continue on the length of the mat then adjust accordingly as you go along the length of your paper.
Grid Ruler

A Grid Ruler is, in my opinion, a MUST have tool.
Mine is a quilting ruler I purchased from a fabric store a long time ago, 1995 I think. My ruler is 17" long and 2" wide. The increment lines are 1/8". Each is marked by a bold solid line, a dashed line, and a lighter solid line both the length and the width of the ruler.
This makes for easy placement of items on your cards or layouts. I use this ruler for exact 1/8" or 1/4" placement of mattes around photos to line everything up evenly and squarely. I also use it in layouts to have equal distance of items placed on the page that need to be lined up.
I totally love the fact that the ruler is clear so I can see through it and know where I am placing items. Not having to guess with the solid wood or plastic rulers purchased from an office supply store or in the school supply aisle of your local big box store.
Specific rulers for scrapbook and card making are similar to my ruler EXCEPT they have a "ZERO CENTER" mark. Tim Holtz sells a Zero Center grid ruler, as does other sites that sell card making and scrapbook supplies.
A "Zero Center" ruler ranges in length from 12" to 15". The "Zero Center" mark is at the 6" line of the 12" ruler and at 7-1/2" on the 15" ruler. Either side of the Zero the measuring marks begin at "1" and go out to the ends increasing in numbers as they go.
If you were to want a brad placed in the exact center of a piece of card stock you have cut, the measurements on each side of the Zero will help you to find the exact center. Not a hard thing to work with. Especially since there is no math involved. I have to use my math skills when using my quilting ruler.
You can read a critique of the Tim Holtz ruler by Craft Critique.
Scissors

Scissors. What kind? How many? Why so many?
In paper crafting it is best to have at least three (3) pairs of scissors. A pair for general paper cutting, a "Precision" pair to do the "Fussy Cutting" and cutting in small areas, and a "Fabric" pair.
The general paper scissors will be used the most. What kind do you get? There is not a specific brand or type to get. If you are a fan of either Tim Holtz or Martha Stewart then you will choose one of their types of scissors. Otherwise get a pair that fit your hand well. There are scissors available to fit "Lefty's" and those feel really strange in the hands of this "Righty". My scissors are Titanium (yellow and gray pair pictured) because I'm pretty rough on them and I figured a name like "Titanium" would mean they are durable and would last a long time. Which they, indeed, have. They started out life as my sewing scissors in 1990 and I've had them ever since. They are too dull for fabric now and would need to be sharpened if I were to go back into sewing.
The second pair you would need is a "Fabric" scissor. You will not want to use your paper scissors when cutting lace or ribbon. Paper scissors chew the fabric and you get a nasty edge that ravels and is not straight. If you have two pair of scissors that are exactly the same attach a piece of ribbon, by tying it on or stapling it on, to one pair of your scissors to denote they are exclusively for fabric. My fabric scissors are the red pair and were purchased from IKEA.
Fabric scissors cut ribbon and lace cleanly with a straight edge. No chewing and no fraying. Make sure to NEVER use your fabric scissor on paper. Paper immediately dulls the blades. You won't be happy with the results later on.
"Precision" scissors or "Detail" scissors have smaller and thinner blades that allow you to get in close to what you are cutting. The points are sharper to get into those tight places for clean cuts. You can also use the tips to pierce the paper to begin the inner cut away of paper - like inside the letter "O" of a block letter.
"Fussy Cutting" is done with Precision scissors. Cutting out a butterfly image with the skinny antennas to add to your card or layout is a good example of using Precision scissors.
Tweezers
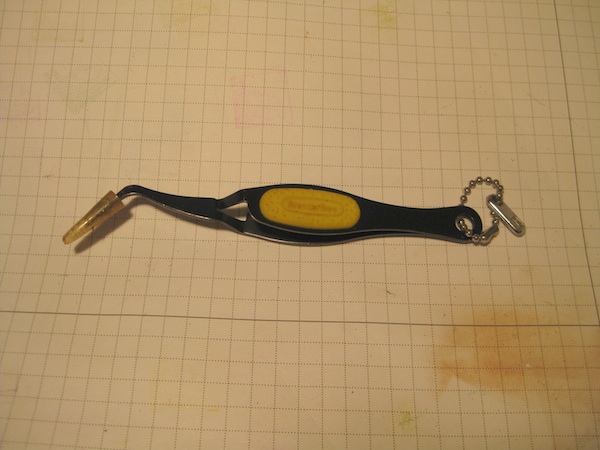
Craft Tweezers are not your normal eye brow tweezers.
Craft Tweezers have a super SHARP point to each blade. This allows you to get under a sticker embellishment and peel it from the protective backing. Using the tweezers in this manner keeps the oils in your fingers from getting on the adhesive and causing "Voids" in the glue.
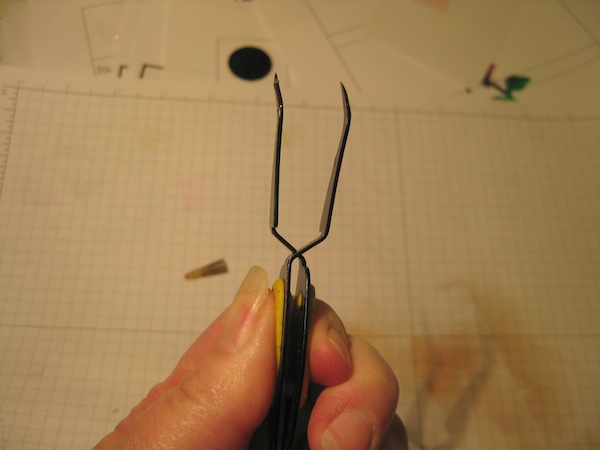
To use Craft Tweezers you will do the opposite of your eye brow tweezers. Squeeze to OPEN the prongs.
The person that invented these tweezers needs a great big HUG! Peeling a sticker from a sheet and moving it to your card or layout with a regular pair of tweezers is not the easiest thing to do. Let go of your grip for one second and that sticker is no where near where it is supposed to live.
Craft Tweezers make this so much easier. Press on the middle section to open the prongs. Get under the sticker with one prong then release the middle section of the tweezer to get a really firm grip on that sticker for placement.
I use my Craft Tweezers in tons of applications. Mostly to hold small stamped images being treated with heat embossing techniques to keep my fingers away from the heat tool and the hot embossing powder.
I use the pointy tip to stab wayward dots or small scraps of paper that need to be adhered on cards or layouts. I even use my craft tweezers to nudge rhinestones in place after they have been daubed with glue.
You will find all of these hand tools pretty indispensable in your crafting arsenal. All of these items can be purchased at your local craft/hobby store or at any online scrapbook store.
Cropadile
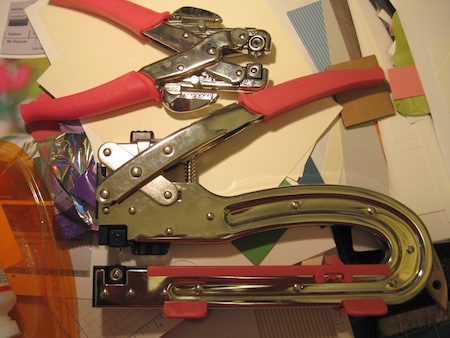
Cropadile hand tools are hole punchers and eyelet setters. I have two that I use. These are purchased from your local craft/hobby store or online at any scrapbook store. The prices range from $30 for the hand held, plier type, to about $45 for the odd looking tool.
The hand held Cropadile is the tool that looks like a pair of alien pliers. Tammy Mitchell of "The Scrap Spot" has a YouTube video on how to use this tool.
The larger Cropadile is called the "Big Bite". It works the same as the hand held for setting eyelets or grommets. The difference is that with the Big Bite holes can be punched into the center of a 12" x 12" piece of card stock, or further in your project than 1".
Joy's Life has an excellent video on both the Big Bite and the standard Cropadile. This video has close up views of the functions of both tools to help you decide if you want to purchase these tools.
Silent Setter
The "Silent Setter" is a hand tool for punching holes in card stock to set eyelets, grommets, and brads. This tool was the first one of these eyelet setters I purchased for my own use, way back in 2005.
With the Silent Setter, holes can be punched and filled with eyelets or brads anywhere you want them on your page. Along the edge and 1/2" in or anywhere else on the page. With the Silent Setter and a ruler you can punch and set eyelets on a diagonal from one corner to the other. The only boundaries are the edges of the paper and your imagination.
I have a video I made for my daughter on using the Silent Setter. It is a 2-Part and you can watch the second part if you wish to.
Your "Smoke Detector" is not going off!! I have had a problem with ours and you hear the "Beep" in this video. Sorry.
Paper Crimper
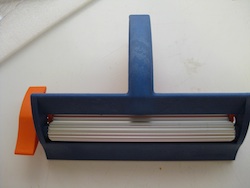
The "Paper Crimper" is a tool that does not get used much in crafting. Not as much as it did when it first came out. This tool turns paper into the look of corrugated inserts of cardboard.
Any paper you wish to use, even a thinner cardboard can be used in the crimper. Such as a piece you have cut from a cereal box. This tool gives your project dimension by the raised effect left on the paper. Mountain and valley grooves. This tool can be purchased at any craft/hobby store or online at scrapbook stores. The prices range from $7 to $10.
I have a video I made for my daughter on how to use a paper crimper. Yes, you will most likely hear my smoke detector beeping. We had some faulty ones that drove everyone mad, crazy.
All of the tools listed in this section are available at your local craft/hobby store and can be purchased online at any craft store. I hope this information has been helpful to you in choosing hand tools for your crafting. There are tons of YouTube videos from crafters all over the world showing you how to use these tools on projects.