


Creating Photo Mattes
What is a photo matte, you may ask. Another question might be why would you make a photo matte? I will try to answer these questions, and any others that may come up.
A photo matte is a "frame", if you will, around a photo on a scrapbook page. As with the pictures you may have hanging on your walls, they have something surrounding them that give them a "home" or a place to "live".
Scrapbook layouts, usually, have more than one photo on a page. The background paper can swallow them up and make them disappear altogether. The photos can blend in so well that they get lost. A viewer of your layout will skip right past the photos and only notice the print of the paper. Their brain will know there are photos on the page but their eyes will totally miss them. So we need to force their eyes to stop for a moment and look at the photos. Photo mattes accomplish that task.
Photo Width
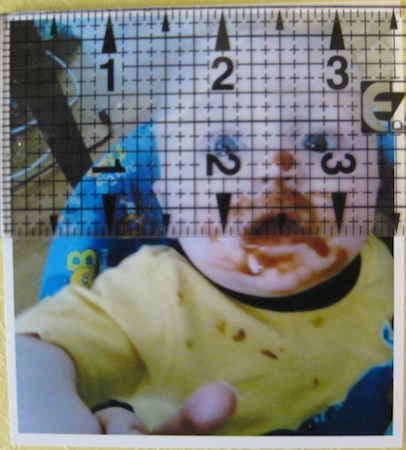
With a ruler, measure the distance from the left edge of the photo (white space included) to the right edge. Write that measurement down somewhere so you don't have to measure again. You don't know how many times I've had to remeasure a photo because I forget to write it down.
The width of this photo is 3-5/8" wide. That is from the left white space edge, all the way across to the end of the white space on the right edge. If you are using "borderless" photos, meaning they don't have a white border surrounding the photo, you will measure from the left outer edge to the right outer edge.
If the right edge falls between a 1/32" or 1/16" mark on your ruler, make the measurement to the next 1/8". This will save you sweating the math part when we come to that.

Photo Height
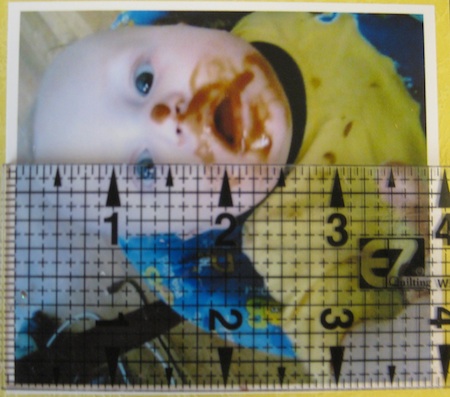
Next, measure the height of your photo. Do the exact same thing with the height as we have done with the width.
Include all of the white border around the photo, if there is one. Write this measurement down. Oh, and please make sure that you write "Width" and "Height" next to your measurements. That will keep you from going back and remeasuring to figure out which is the height or width you had written down previously. Experience, once again, talking.
One think I have neglected to mention. If your photo is any shape other than square or rectangular (like an oval) measure from the widest part of the photo on both ends. Top and sides. A hexagonal photo (stop sign shape) will be measured top to bottom and side to side at the widest points.
Math Formula
We will be making two photo mattes from the measurements we just took on the photo itself.
Don't worry, this will not involve any algebra equations or calculus. Trust me, it has to be dead simple for me to work it out. You will only need to have a minor knowledge of fractions. It is my firm belief that whoever decided to mix letters and numbers together to do a math function ought to be socked hard in the arm!
For the first photo matte. To get 1/4 inch of the card stock to show around the photo, on all four sides, we will be adding 1/2 inch to the width and height measurements we just took from the photo.
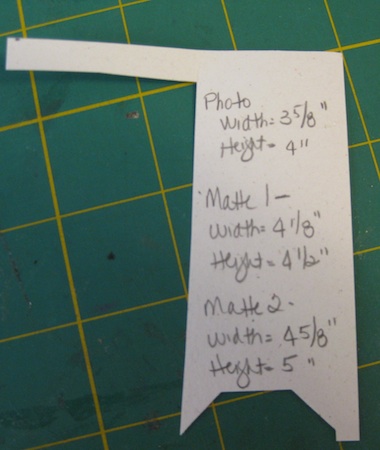
Photo width is 3-5/8" + 1/2" = 4-1/8"
Photo height is 4" + 1/2" = 4-1/2"
For the second photo matte. To get 1/4 inch of the card stock to show around the first photo matte we will be adding another 1/2 inch to the width and height measurements. This time it will be width and height measurements of the first photo matte and not the photo.
Photo Mat width is 4-1/8" + 1/2" = 4-5/8"
Photo Mat height is 4-1/2" + 1/2" = 5"
See that was not so painful, now was it! So you will cut your first photo matte to a width of 4-1/8 inches and the height to be 4-1/2 inches. This will give you 1/4 inch "reveal" around the photo of the card stock you will place behind the photo.
For the second matte you will cut the next color of card stock to a width of 4-5/8 inches and a height of 5 inches. This will give a "reveal" of 1/4 inch around the first photo matte and a half inch "reveal" around the photo itself.
If you want a smaller "reveal" area for your photo mattes you will change the formula just a smidge. For example if you want only 1/8" "reveal" your width and height measurements will have 1/4 inch added to them. To have a bit of a challenge to your math skills, if they are as rusty as mine are, then figure a 1/8 inch "reveal" around the photo with the first matte then figure for a 1/2 inch "reveal" around the first matte.
You would add 1/4" to your photo measurements on both width and height. For the larger photo matte, you would add 1 inch to the width and height measurements of the first photo matte.
Okay, clear as mud? I hope not. Have fun creating photo mattes.