


| What a Mess | Paper Bags and Supplies | Paper and Tools | Front Cover | Page 1 | Page 2 | Page 3 | Page 4 | Page 5 | Back Cover |
What A Mess
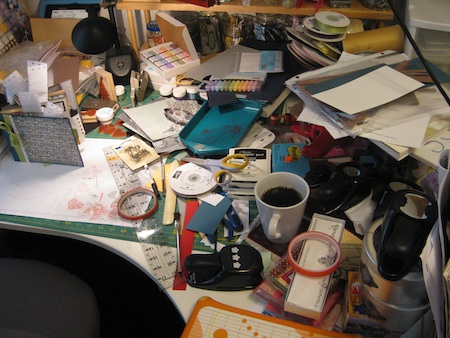
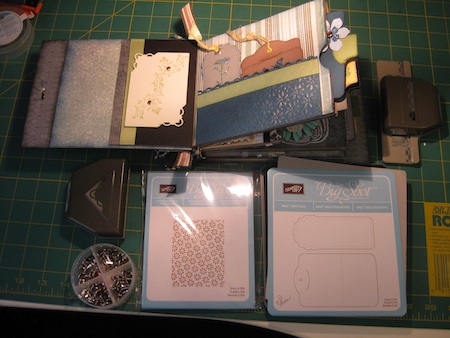
Creativity in my little room can sometimes make it look like a bomb went off in there. You might not believe that something special can come out of all that chaos but it does. Try as I might to put things back after I use them, doesn't work well. I no sooner put something back then I have to get it back out again because I've had another brilliant idea.
This mess was where, and how, I created a Mini Album for the girlfriend of our youngest son. It is a paper bag album with hard front, back, and spine covers.
I have heard that Mini Albums are ADDICTIVE. There is some truth in that statement. First, they are smaller than a 12 x 12 or 8-1/2 x 11 album. Second, most all the "Rules" are chucked out the window. Third, you as a creator are set free. The only boundaries are the page sizes and that is it. Well, that is not quite true. Your Mini Album does have to close and be able to withstand the recipient attaching their photos and putting in their memorabilia. Even if the recipient is YOU.

Paper Bags Are Used
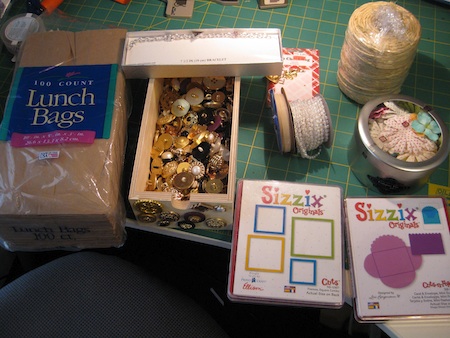
Here is a "gray area" in scrapbook making. The paper lunch bags you can buy at your grocery store are NOT Acid and Lignin Free. There is a possibility that all photos put in a paper bag album will degrade, turn yellow, and become brittle in a few years time. How many years? I don't know that exactly. So one of the "Rules" has already been chucked out the window.
Speculation on the subject of paper bags and photo degradation is akin to a major political debate. Both sides weigh in on this one.
Paper bag mini albums are, usually, left to the open air for any "Off Gasses" in the bags to be released. A mini album will be opened and handled more than a scrapbook album will be.
Scrapbook Albums, on the other hand, are generally constructed with pages encased in an Archival Quality sheet protector that seals out the harmful stuff in the air that would damage photos.
This YouTube video is a fantastic tutorial on how to put the paper bags together to create the "pages" of the Mini Album. I do not have the author's permission to display this video is why there is only a link to it.
Papers and Tools You Can Use
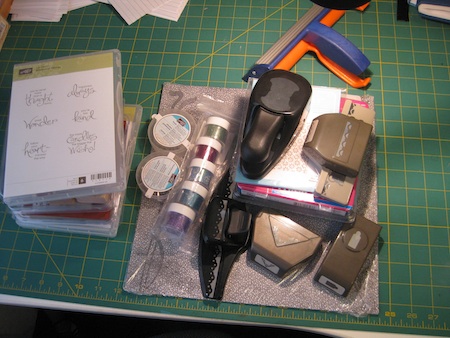
Scrapbook paper, punches, rubber stamps, glitter, brads, a crimper, cutting dies, and anything else you want to use can be used in Mini Albums. In the previous photo I have a bracelet I purchased at a Dollar Store and I used the charms and beads from the bracelet in this Mini Album.
Card stock and patterned papers are used for the backgrounds of each page. Sturdy card stock is used in Mini Albums because of their heavier weight than most design papers. They will support photos and other embellishments better than most design papers. Is there a color or pattern guide to go by? No there is not. I've seen a Mini Album done all in black that is absolutely stunning. You are set free of the "Color Choosing" process by auditioning papers to your photos. So this means that another "Rule" has been chucked out the window.
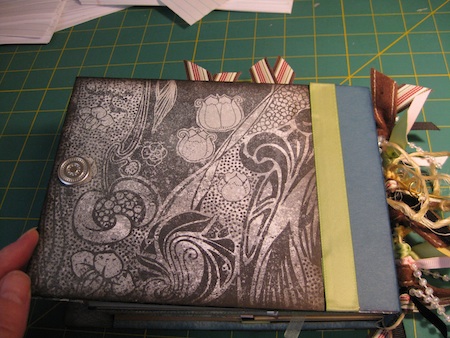
Front Cover
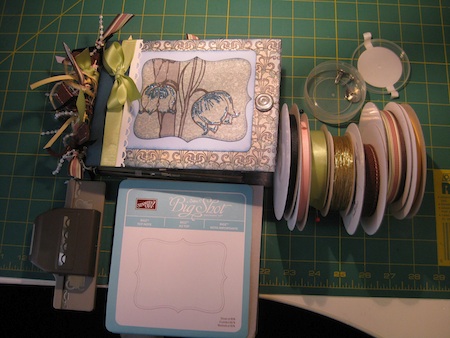
This is the front cover of the Mini Album I made for my son's girlfriend. It already expanded so much from what I had put inside I had to make a special closure to contain it. Some elastic gold thread is looped around two extra large brads - one on the front cover and the other on the back cover. A length of packing twine or rope is wound around the spine and tied in a knot. Ribbons and fibers are then tied to the rope. Charms usually are added to the ribbons on the spine to give further visual interest. I don't remember if I put charms in these ribbons or not.
You can put a Title on the front cover if you know what will be going inside the album. I was not sure what she would be putting in it so I left it blank. You will see Mini Albums with lots of flowers and bling all over the front. I'm still not really comfortable with all that and I was not really sure how my recipient would feel about all the "girly" stuff either.
Page 1 of the Mini Album
The tags on the right side are tucked into a pocket. They can be removed and photos or journaling can be added to the tags. Any other memorabilia can be tucked in the pocket. The bag opening, to the right, has two large tags tucked inside. These can hold photos on both the front and the back. A photo can also be attached to the inside of the front cover on the left.
If you are considering making a paper bag mini album the one thing to keep in mind is the more bags you add the more cumbersome it will be. Generally speaking, six (6) paper bags are the best amount to use.
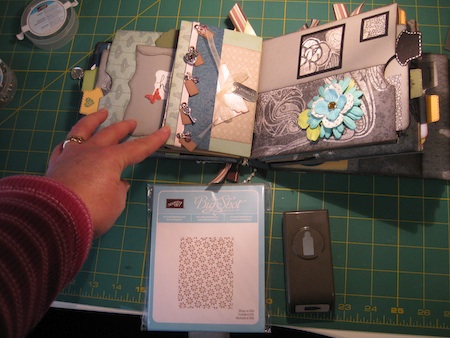
Page 2 of the Mini Album

As you look at the photos I have for each of the sections of this Mini Album you will see the cutting dies, embossing folders, and tools used to create the things attached to each page.
On the small bag flap in the center, I have pressed a rubber stamp into some air dry clay I purchased at the hobby/craft store. I then colored the indented image with markers. On the left page is another pocket for a tag or memorabilia she might want to use. These Mini Albums are full of pockets and hiding places for things. You will see as we go along that these pockets and hiding places can be as inventive as you want them to be.
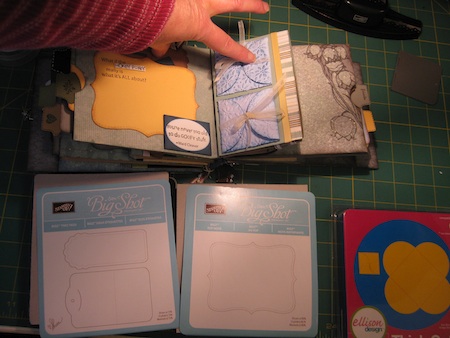
Page 3 of the Mini Album
The Dollar Store bracelet charms and beads appear on the center panel of this page. More pockets to tuck photos and things and large tags poke out of the bag opening.
Any thing you can think of to place on a page is good. Think about the time when you were dating your spouse and went to a concert or a game. The ticket stubs fit in one of the little pockets. The things you remember of the event can be jotted down on the journal tags.
If you know how to make jewelry this is a project to display that talent. Fashion dangling beads and charms to give your pages a bit of mobility and interest.
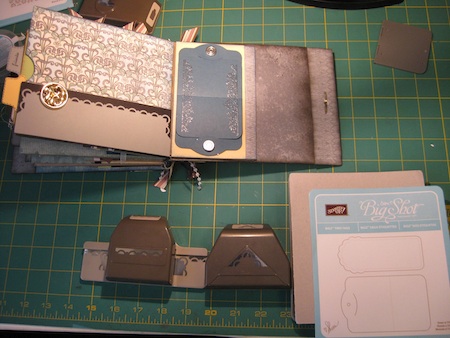
Page 4 of the Mini Album
On the center flap I have two die cuts that form a sweet pocket. Each is tied with ribbon to hold the pocket flaps closed. Once they are opened a small photo or anything small enough to fit can be stored away and kept safely.
A space for a photo or journaling about the pocket contents is on the left side of this page. Putting in special little areas like this are what make scrapbooking fun. This is also a way to win over the skeptics who think that scrapbooks are "dumb", as I've heard it told to me before.
Page 5 of the Mini Album
This is the last page of this Mini Album. It has a pocket on the left side and another hiding place for photos or journaling on the right side.
Mini Albums may be small but they are easier to put photos in from a family vacation, a honeymoon, or an event. The space they take up is not as much as a 12 x 12 or 8-1/2 x 11 album would be. Mini Albums are also highly decorative. They beg to be looked through and enjoyed.
If you have grade school aged children and want to create a "Brag Book" for the grandparents a mini album would be ideal. School photos of your children on the main page elements and tucked inside the paper bag pockets are samples of their hand writing or art.
Back Cover of the Mini Album
Unless you know the Mini Album will be standing upright, leave the back flat. If your Mini Album does not have a hard cover and spine to stand upright, anything bulky you put on the back will eventually distort the pages as they rest upon themselves. Their very weight will cause them to become misshapen by bending around the bulk on the back cover. So to keep the pages, and the treasures within, safe it is recommended that you have a flat back to the book.
There are a lot of videos on YouTube for Mini Albums and they come in many forms, not just paper bags. Mailing envelopes of all kinds have found their new life as a page and pocket for Mini Albums. Everyone has bathroom paper in their homes. The cardboard core from an empty roll of bathroom paper smooshed flat and covered with decorative patterned papers a hole punched in one end to be held by a binding ring and that is another Mini Album.
You have a lot to look forward to in scrapbook and card making. These paper crafts can open a whole entire new world to you and your family. Have fun creating in your space. Just remember the first photo on this page. If your table or work surface is sparkling clean then, "you ain't creating".