


| Journaling on Tags | Letter Stickers | Steps to Adhere Letters | Journaling on Embellishments | Journaling Around Photos | Finished Layout |
Tag Journaling
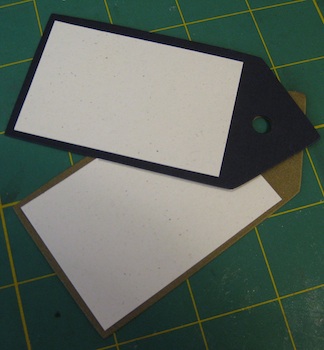
I have decided to put white card stock on the two large tags. A place for me to write what this layout is about. If you don't like your handwriting you can use your computer to do it for you. There are tons of fonts at your finger tips. I don't know what kind of software you have on your computer and I AM NOT going to recommend any type of desktop publishing software for you to use.
As you see in the photo, I have the tags positioned the way I want them to be when they are done. They are not attached to each other right now, although I could have done so and skipped the next step. I will be using letter stickers on this tag so I need to be able to see what I am doing is why they are not attached right now.
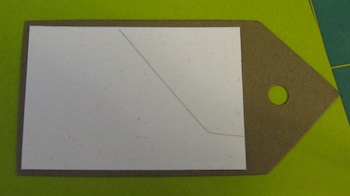
I have traced around the bottom of the top tag. This is so I don't forget where I had it positioned. It also gives me a visual cue of the boundaries I will have when I write on this tag.
I prefer to use a pencil when marking locations. It is easy to erase, and if I forget to erase the line I don't have to worry about any problems later on with photo damage. Surprisingly, pencil lead is Acid Free and does not emit gasses that will cause problems, as a regular ink pen will do.

Letter Stickers

Letter stickers can be purchased at any craft/hobby store or online at scrapbook and card making websites.
Letter stickers come in a wide range of styles, colors, textures, sizes, fonts, backgrounds, and types. There are stickers with white backgrounds that can be inked to match your layouts. Some stickers are on clear vinyl, as shown in the photo in this section.
You are not stuck with using letter stickers. If you have a Cricut or have letter dies you can use them also and glue your letters on your tag.
I have chosen stickers because they have not seen the light of day in quite a few years and it is about time that I bring them out and use them. Working with stickers can be really tricky. If you use my "trick" you will find the process easy and the results will be fantastic.
Steps to Adhere Letters

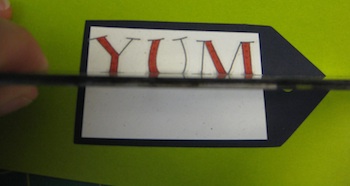
This clear grid ruler is my "Go To" tool. It is the one tool I use the most in all of my paper crafting.
Step One
The first step in this process is to choose the letters you want to use. Pick them off the sticker page with a pair of tweezers so you don't get the oils from your fingers on the adhesive. That will cause voids in the adhesive and the sticker won't "stick" well.
Where you place your first letter sticker on the ruler doesn't matter. I find that if I start the first letter away from the left edge of the ruler I have more "wiggle room" to work with than if it were placed on the left edge.
The important thing is to line up the bottom border of your letter directly on the 1/8" mark on your ruler. This gives a place for your letter to "sit" while you are attaching your other letters. Do Not press the stickers down to the paper below just yet. Let them be suspended from your ruler. If you need to make any adjustments to the line up, or position, it will be so much easier if they are not stuck down to anything.
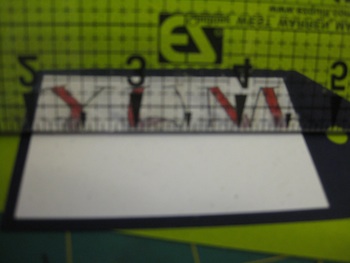
Step Two
Now that your letters are attached to your ruler, move it over to where you want them stuck down. The stickers being suspended from the ruler makes this part really easy. Move the ruler back and forth, or up and down, until you have the letters positioned in the right place.
Are you thinking of using letters on a border strip that spans the width of your page? This ruler trick is fantastic for that job. Your letters will be spaced and lined up perfectly - well as close to perfect as you can get, anyway.
If you will be using letters that don't have adhesive on the back you have a couple of choices. Put a little bit of double sided sticky tape on the ruler where you will be placing each letter on the ruler. Or you can apply a bit of repositionable adhesive to the bottom of each letter then attach it to the ruler. I'll tell you how to add adhesive in a little bit.
Step Three
Now that you have the letters where you want them to be placed, press with your thumb on the top of each letter to hold it in place.
If your letters have been cut using a die machine on plain paper, apply adhesive to the backs of your letters is what you will do before you do this step. What kind of adhesive are you going to use? Liquid glue, glue stick, a Two-Way glue? You can use any of these adhesives. You will need to stay on top of them and make sure they don't wiggle out of place when you are doing the next few steps.
Some papers have a tendency to weaken when liquid glue is applied. And if your choice of letters has some extremely fine lines they will tear and cause you to say a few words that sound like "bleep, bleep".
Now that you have pressed the top of the letters down in place, no need to rub on them and get them permanently adhered right now. Just stuck to where you want them so they don't find a different place to live.
Step Four
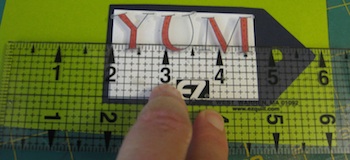
Oh so carefully, roll the edge of your ruler upward as in the photo. This will cause the stickers to come in more contact with the paper below. Since you thumb pressed them into place in the step above these letters are not going to go anywhere.
If you are using a liquid adhesive, at this point you might need to check on your letters and make sure they do have adhesive on them still. Some of the Two-Way adhesives will have dried by this time and the glue is no longer permanent but has become repositionable. With some fussing and adding a bit more glue to the underside of the letters, by way of lifting the ruler and turning it over again and applying more adhesive, you can get the letters set and get back to this part of the steps.
Step Five

Before you take the ruler away make sure you hold firmly to the border or tag you are applying the letters to. This is an important step and must not be neglected. This is the time when one of the stickers will want to hang on to the ruler and there will be more "bleep, bleep" things said.
For the liquid glue application part of this step it is extremely important that you apply hard pressure to your letters. Any of your letters that have fine lines, this will be the time when they will tear and you will stop the project right here and never revisit it again. Well, at least not until you have calmed down and want to try it again.
If you have attached your letters to the ruler using double sided sticky tape, now is the time to be careful. Thin parts of the letters will stick extremely well to the tape and not want to budge.
Step Six
Roll your ruler further forward so the letters are fully on the border or tag. You won't need to rub on them in this step. If your ruler is held correctly in this step there will be no room for your fingers to get under it and rub on the letters.
When you applied the pressure in the previous step the stickers will have been pressed down to the paper and seated in place. Same for the liquid glue application. The liquid glue has now come in total contact with the paper and has had a bit of time to get a "tooth" hold.
Care must be taken at this point if you have double sided sticky tape on your ruler holding your letters. The next step involves pulling the ruler away from the letters and this could be where things go badly.
Step Seven
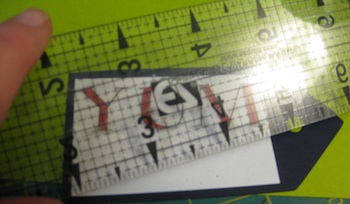
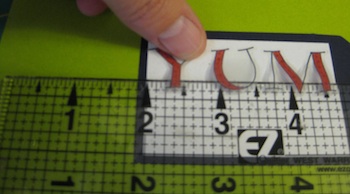
As you turn your ruler fully upside down, pull toward you as you turn. This will cause the letters to let loose of the ruler and finally rest on the paper below. You are nearly done. Whew!
For the liquid glue application you are not out of the woods just yet. If you attached the letters with clear tape on the ruler you will need to lower the ruler enough for you to get in and detach the tape holding the letters to the ruler. Once that is done then follow this step of rolling fully over and pulling towards you to dislodge your letters. You can remove the clear tape now.
Step Eight
Mash those puppies down! Use a brayer to press and roll over the letters and get all the air bubbles out. Same with the liquid glue application. If you don't have a brayer then use a bone folder and press hard as you work back and forth up and down.
Liquid glue application, be careful with the bone folder. You might twist it in your zealous pressure action that you will move the letter beneath and cause it to tear or become misshapen.
Okay all that is left is to raise your hands above your head and shout "Woo Hoo"!!! Oh, and of course, admire what you have just accomplished. The hard part is OVER!
Journaling On Embellishments
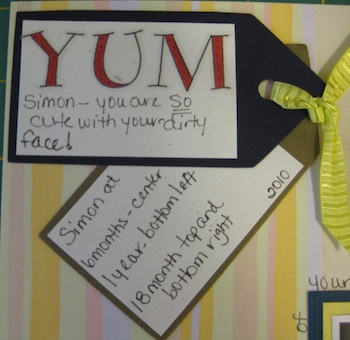
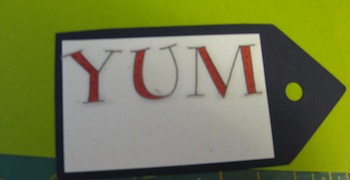
As you can see by this photo, I've used both of the tags in this embellishment. Since my grandson has food all over his face, and I think it is just precious, I'm using these tags as my "Title" for the page. The actual "Title" is YUM. I have written my pleasure in seeing his face in these photos, his age for each of the photos since they span in age from six to eighteen months, and I've made a "2010" note on the tag which means this layout was completed in 2010. I could have put the full date on there but I chose to just put the year.
Just a bit about TITLES before I forget about them totally. Page titles can be placed anywhere and in any size on your layouts. They are not restricted to any one place on your page. They don't need to spread all the way across or up and down. They just need to have a "presence" on the page. Some way of being distinguished from all the rest of the journaling on your page.
In my search for information on creating scrapbook layouts I learned about all different ways to create titles and where they need to be placed. The majority of the information dictates the Title is to be placed at the top of the page and be very prominent. Sometimes you may have several photos that would not allow you to put a prominent Title at the top of the page. You will find a solution that works for you.
However, there is one RULE that will need to be followed. When you will be making a two page "Mirror" layout - meaning that each page will look exactly like the other only mirrored - what you do with one page has to be done on the opposite page. You can spread the Title over the two pages but you will have to have the same border across both pages.

Journaling is not restricted to tags and squares or rectangles of card stock. I've placed a chipboard image of an ice cream cone since my grandson is eating one in the photos on this layout.
The graphic of the ice cream on the cone has arcing lines. I've made use of those lines as a journal spot. His Mom has told me that, for a while, every time the freezer door came open Simon thought it was time for an ice cream cone. Made her laugh and drove her mad at the same time. When she sees this page she will remember all the times that Simon begged for ice cream because he really likes it. When Simon gets quite a bit older and sees this page with his Mother, she will tell him about all the things he did to get his favorite treat and how she felt during those times.

I found a chipboard birthday cake in my stash. It has one lit candle and is perfect for this page showing Simon's First Birthday. I've used the "frosting" and the "cake plate" areas to do my journaling. This embellishment tells it is Simon's First Birthday, and the date of this event.
Make your embellishments work for you. Store bought or made by you, embellishments have the power to narrate your story, or punctuate it. If this cake embellishment were being placed on one of my granddaughter's layouts I probably would have added some glitter or rhinestones to glam it up. But since this is for Simon, and the "pink" is bad enough, leaving it plain with my journaling is good for a boys layout.
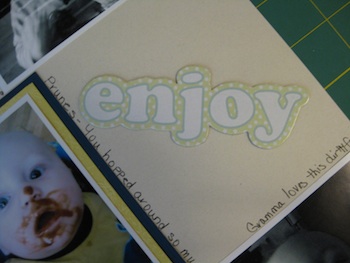
I had originally wanted to use a chipboard word "Smile", and you have seen it in the previous section on Embellishments. I've changed my mind and wanted to use a word that gives a bit of emphasis to what story these photos tell. The photos don't have anything to do with smiling, although I have done quite a bit of that. These photos are about enjoying foods.
This embellishment is not as brightly colored as the "Smile" one was. I did not write anything on this piece. I am using it as a "prompt" to the viewer. What is he enjoying? The stories that can come from family because of this one chipboard word would be fun to hear. This plain embellishment speaks, as do the others, even though it is not altered as I've done with the other two.
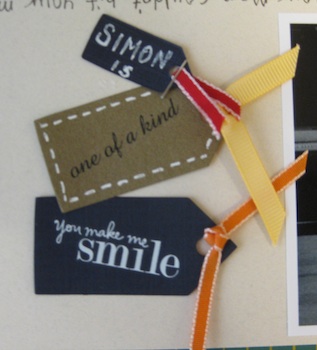
The tags I made in the "Embellishment" section are now together to tell a story. These tags say that "Simon is one of a kind" and he "makes me smile". Adding different color ribbons to each of the tags help to separate them from the grouping. Each tag tells a bit of the story in this layout. They are small but they do pack a good punch.
Journaling is not totally relegated to a piece of card stock with detailed writing about your event. Journaling can be done on just about everything you can think of. Even ribbon.
Your infant and toddler children will soon grow into young adults. Remembering, and cherishing, the times when they were small and learning about their world is the important thing.
Journaling Around A Photo
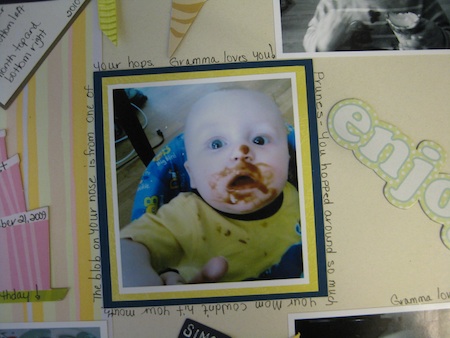
Journal around a photo. This will force the viewer to take a closer look at the photo itself and learn about it. I had, originally, wanted to have a small tag with the word "Prunes" on it. The word would not fit on that small tag and I used up both the front and back of the tag in trying to make it fit. My alternative was to journal around the photo and tell the story of that prune smeared face.
When you journal around a photo, it is extremely important to use a marker or pen that is Acid Free. This precious photo could succumb to the vagaries of deterioration and be ruined later had I used a regular pen or a Sharpie.
When you write around a photo, don't be overly concerned with making sure the writing is going the right way as you look at the photo. It is fun for the viewer to get a chance to read upside down once in a while. If they have problems understanding the writing not being upright they can turn the book around as they read. A bit of "interactivity" is fun and breaks up the monotony that can develop after a while. I mean, I've looked at scrapbook albums that are beautiful with all the flowers and bling on them. I love going through the pages, but after a while it gets boring and I skip pages. Give your viewer a reason to look at your pages and not skip around.
Finished Layout

Here is the completed layout. You have gone with me from the beginning. Choosing the papers for a layout, creating photo mattes, mounting the photos with the "Rule of Thirds", gathering and creating embellishments, and journaling.
I hope you have a better idea of how to create your first scrapbook layout. I also hope that you are no longer intimidated by the process of creating with your photos. Starting out is going to be a little nerve wracking. You'll question all of your choices. Change you mind several times, waffle back and forth on something. Ultimately, you will follow through and complete one entire page. Once you conquer that mountain then it is all downhill from there. Continue your search and look at the work that other people do. You will eventually find your style and what works for you. The most important advice I can give you is to be kind to yourself in this learning process and to have fun with it.